Bathroom Wall Decorating Ideas


Your bathroom is one of the most important rooms in your home. Create a relaxing and inviting oasis by selecting the right bathroom wall decorating schemes.

Wall Decals

1. Wall decals offer unique decorating options in a range of sizes, shapes, and colors. Before you apply them, make sure your bathroom walls are clean. Wait at least 30 days after painting before applying wall decals directly to the walls. Wall decals are available online and at home decorating stores.

Shelves

2. Adding shelves to a bathroom wall can give a small bathroom more storage and allow decorative color and display options. Shelves are available at most home improvement stores.

Posters

3. Frame posters, such as a print of a well-known painting, and hang them on your bathroom wall for a personal flair. Framing a poster and hanging it in your bathroom is an inexpensive way to decorate bathroom walls.

Sconces


4. Sconce light fixtures installed on both sides of your vanity will add soft light to your bathroom. Soft light helps you relax after a long day of work.


Decorative Paint

5. You can paint one wall a bold color to accent a more neutral scheme. You can also use multiple colors of paint to create unique designs on your wall.

Apply Vinyl Wall Decals in Your Child's Bathroom

If you are a parent that wants to add a bit of "personality" in the restroom that your child uses, it is to your benefit to learn how to apply Vinyl Wall Decals in your child's bathroom.

There are many creative Removable Wall Stickers that are especially designed for children on the market today. You can find "Under the Sea" themes, scenes from favorite cartoons and movies, as well as other appealing stickers that reflect items that interest children, such as wildlife, boats, flowers, dinosaurs, space related themes, bugs, and more! I will provide several steps that will help you learn how to apply Vinyl Wall Decals in your child's bathroom in a creative fashion.

1.
The first step to implementing the Removable Wall Stickers that you have purchased for your child's restroom is to give some attention to the toilet. Yes, wall stickers are designed to be placed on the wall, but they can easily be used on other surfaces as well. The toilet is often the one piece in a kid's bathroom that is left unadorned. It is easy to overlook this structure, but if you work it in when designing the room, you will find that it adds a lot of appeal to the room.

Vinyl Wall Decals may be placed in the area behind the seat, as well as on seat covers. If using a theme, such as "Under the Sea", you can place some coral reefs and shell decals at the bottom behind the seat area with a few small fish swimming. This is just one example of many that can be used on toilets. By taking the time to use your creativity ingenuity on the toilet, you may add a whole new sense of wonder to an otherwise boring room!

2.
The next step to placing Vinyl Wall Stickers in a kid's bathroom is to turn your focus in on the mirror in the room. If it is a medium to large mirror, you can actually place the Removable Wall Stickers along the sides, in the corners, and more! If you want to really enhance the appearance of the stickers that you place on the bathroom mirror, take the time to outline them in decorative glitter paint! If you have a large decal, you can actually place it in the center of the mirror, trace it, remove it and outline the tracing in the paint of your choice. There are several ways to be truly creative when it comes to vinyl wall decals and the bathroom mirror!


3.
Now it is time to turn your attention to the bath and/or shower area in the kid's bathroom. You can get a see through or a solid color shower curtain and take the Removable Wall Stickers and place them in various locations on the shower curtain. Once this is completed, hang the shower curtain and focus on the walls that surround the bath and/or shower area. This is a fantastic area when it comes to placing decorative Vinyl Wall Decals!

As you can see from the information contained in this how to home improvement guide, there are many creative measures that can be taken when it comes to applying vinyl wall decals and Removable wall stickers in a child's bathroom. All it takes is a little money, some shopping, a little creativity and within just a couple of short hours, you can totally recreate the bathroom that your child uses to reflect their unique personality!

Polka Dot Bathroom Ideas for Teens

Bright, bold designs create an ideal flair for teenage living spaces. Vibrant polka dots can breathe decorative life into an otherwise ordinary bathroom. Choosing energetic colors for paint, wall stickers and other decor is best. Add a personalized touch by incorporating unexpected textures and etching glass.

Background

1. The first step in creating the ultimate polka dot paradise is establishing the backdrop for the room. Before beginning, select two or three base colors for the room. Colorful combinations include black and pink, green and white, brown and blue, as well as red and cream. The base colors should be bold and contrasting to create a focal 'popping' effect.

Choose one of the colors to serve as the background while the other color(s) will be used for accents, including the polka dots. For a subdued, mellow approach, paint the walls with the lighter color and use the darker color as an accent. For a bold, dramatic room, reverse the pattern to use the lighter color as an accent and the darker color as the backdrop.

After the walls are painted, decide on the size of polka dots desired. Large dots create a focal point while smaller dots provide a softer accent. Dots can be painted by hand using a round object as a guide. For an easier method, purchase polka dot wall stickers in the desired colors and apply them directly to the walls.


Essential Decor


2. Too many dots can cause visual headache and overpower the small bathroom space. Alternate using polka dots and solid theme colors when purchasing accessories and decor. The room should center on a natural decorative focal point. If the walls are painted a bold color, it may be best to provide tamer colors on the remaining items.

Using the polka dot accent color as a base, purchase solid color or polka-dot patterned shower curtains, bathroom mats, toothbrush holders, soap dispensers, towels and other items. The toilet seat cover in a solid color can resemble a giant polka dot due to its round shape.

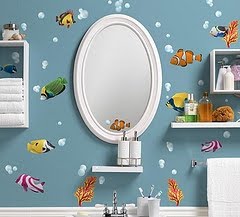
Consider replacing any square mirrors with large, round ones or etching the existing mirror with a polka dot pattern.

Personalization


3. Textured dots can add depth and personalization to the room. Dots created from various fabrics, such as silk, tweed and leather, can be intermixed with painted dots. This contrast creates an unusual visual and sensory experience.

For another unusual approach, consider mixing round mirrors into the scheme. Larger mirrors can be hung on the walls while smaller mirrors can be used to decorate any open counter space. For a colorful decoration, intersperse small mirrors with other round objects, such as craft beads, in shallow, round glass containers.

Etching any glass items, such as mirrors, can provide a customized touch to any bathroom. Make sure the glass is thoroughly clean and dry before beginning. Start by placing a circular stencil on the glass and making sure it is adhered tightly to the glass. Wearing rubber gloves, apply etching cream to the inside of the stencil and ensure the cream is evenly spread. After 15 minutes, remove the etching cream with sponges or paper towels. Remove the stencil and add additional dots or patterns as desired.

Create a Kid-Friendly Bathroom


Design a friendly environment with age-appropriate decoration. Get creative and paint it bright and cheerful colors. Just because it's the bathroom doesn't mean it has to be boring. If the bathroom is mainly used by children add wall stickers and a painted border. Make it a true kid's bathroom. Read on to learn how to create a kid-friendly bathroom.

Step 1
Think small. If you have a bathroom just for the kids get fixtures that are made for children. Lower sinks and toilets that are smaller are available at home building centers.

Step 2

Put a sturdy step stool in the family bathroom so your kids can reach the toilet, sink and cabinets. Don't use granite or smooth tile on the floor of the bathroom. They can become very slippery when wet. Use vinyl flooring or textured tiles to allow for some resistance.

Step 3
Keep cleaners and other hazardous chemicals out of reach. Place them in a cupboard with a lock or warning sticker that your children understand.

Step 4
Give your kids a space of their own. Reserve a drawer or shelf just for their towels, soap, toothbrush, toothpaste and bath toys. Since it's their shelf, they should also have the responsibility of keeping it clean.

Step 5

Prevent the spread of germs by putting up a paper cup dispenser. Using disposable cups can cut down on spreading pesky colds. Make sure all toothbrushes are clearly marked for young children.

Step 6

Set your hot water heater to 120 degrees F to prevent burns from hot water. Make sure the bottom of the tub is covered with a non-stick mat or slip resistant surface.

Step 7
Keep the bathroom friendly and inviting for your children. Add some simple organization and safety measures to make it a kid-friendly room